Thursday November 22 2018
Since Digital ocean has introduced the option of custom operating system images I've been wanting to see if I could get OpenBSD running. I'm sure there are other efforts to make this happen but I didn't bother looking and this is my experience.
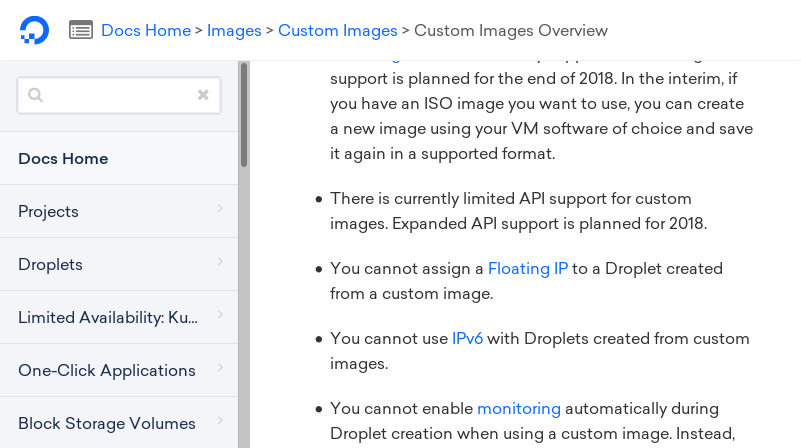
As I was reading through the documentation ( backup screenshot here ) I was disappointed to find out that IPv6 was not supported with custom images at this time.
So at this point you could use a tunnel broker or similar if you really wanted to do this by the book with a custom image and have Ipv6. I have something else in mind.
Since OpenBSD has a small image "minirootXX.fs"that can written to a disk and booted from, and then installing the sets over the network. DigitalOcean has the option for a VNC console to the virtual machine, so it shouldn't be an issue to just use the default installer image for amd64. The only tricky part is going to be writing the image and getting it to boot. Especially since changing the default boot device and or attaching another disk is not something that DigitalOcean gives you control over.
Even though DigitalOcean does provide a Linux based recovery ISO using it is not necessary or even useful as far as I am concerned. Although if you mess up wirting the disk image, you should be able to re-write the installation medium using this. It will not be covered in this document.
This should be pretty straightforward, you're going to need to add your SSH key, etc. Just be sure to enable IPv6, as that's the whole point of this article. I used Ubuntu 18.04 for this although it doesn't really matter too much what you choose these days since they stopped direct booting the kernel some time ago. The commands that follow should work on almost any Linux distribution.
Once that's done, go ahead and get logged via SSH. We're going to need to take note of the network configuration so we can get it setup properly once OpenBSD is installed.
On the new server:
$ ip -4 route > /tmp/addr_info
$ ip -4 addr show >> /tmp/addr_info
$ ip -6 route >> /tmp/addr_info
$ ip -6 addr show >> /tmp/addr_info
On your local machine:
# Where $remote_ipaddr is the IPv(4|6) address found in the DitialOcean console
$ rsync -P root@$remote_ipaddr:/tmp/addr_info ./
Now that's done download the OpenBSD installer image like so:
# You are going to want to double check this, please do not blindly copy and
# paste this snippet of code. Roughly six months after writing this it will
# be out of date and you'll want to use 6.5, etc. Think for yourself.
$ export openbsd_url="https://cdn.openbsd.org/pub/OpenBSD/6.4/amd64/miniroot64.fs"
$ wget $openbsd_url
Now for the fun part. Open up the VNC console to the system, you're going to need it once it reboots. Let's write the image to disk and reboot the system into the OpenBSD installer.
# dd if=miniroot64.fs of=/dev/vda bs=4M
1+1 records in
1+1 records out
4915200 bytes (4.9 MB, 4.7 MiB) copied, 0.0117877 s, 417 MB/s
# echo s > /proc/sysrq-trigger
# echo b > /proc/sysrq-trigger # The machine should immediately reboot after this
From here you can follow a pretty standard install of OpenBSD. I've chosen to only configure IPv4 during the install, although it should be possible to configure both at installation time if you're so inclined.
At this time it may be worth referring to the addr_info file you created
and downloaded a moment ago when configuring the interfaces.
Since you're remote and you only have a ( probably ) slow and painful to use VNC console I do recommend you enable SSH and leave password authentication on until you can copy your key over. ( Which should be the first thing you do )
I like to go with a singe large root partition for small virtual machines like this. ( As many of my personal servers run off of nothing more than a $5/mo vm from DigitalOcean or other providers such as GCP and Amazon ) It's not strictly necessary and the defaults will do but I find I run out of space more often than I have a need for them to be split up.
Such configuration would be as follows:
Use (W)hole disk MBR, whole disk (G)PT, (O)penBSD area or (E)dit? [OpenBSD] W
Followed by:
Use (A)uto layout, (E)dit auto layout, or create (C)ustom layout? [a] C
Which will bring you to the label editor, which has fdisk like commands,
but for the bsdlabels. If you're not familiar with such things it can be
very confusing and it's worth reading the
documentation. The Wikipedia pageis also helpful if you need a
high level overview
The use of disklabel is as follows:
> a
partition: [a] a
offset: [64]
size: [52420031] -1G
FS type: [4.2BSD]
mount point: [none] /
> a
partition: [b]
offset: [50331616]
size: [2088479]
FS type: [swap]
You can then use p g to check your work, like so:
> p g
OpenBSD area: 64-52420095; size: 25.0G; free: 0.0G
#		size		offset	fstype	[fsize	bsize	cpg]
  a:		24.0G		    64	4.2BSD	  2048  16384	  1 # /
  b:		 1.0G	      50331616	  swap
  c:		25.0G		     0  unused
>
Once you're satisfied with the layout:
> w
> q
OpenBSD's installer now is going to ask you where you want pull the sets from,
you can use ? to list all of the servers and just enter the number of the
one you want.
The default server directory should be fine.
Installing the sets:
Set name(s)? (or 'abort' or 'done') [done] -x*
Set name(s)? (or 'abort' or 'done') [done]
I specifically avoid installing anything related to xorg on a server, it does have a VNC console if you're into that sort of thing I guess. I for one am not.
The installer should take care of getting, verifying and installing the sets from this point.
At this point:
Exit to (S)hell, (H)alt or (R)eboot? [reboot]
Just hit enter to be greeted by your shiny new OpenBSD system.
/etc/hostname.ifIt's pretty straightforward, all you have to do is read the IPv6
settings from the addr_info file that you created and add the
lines to your /etc/hostname.vio0 file, like so:
# ed /etc/hostname.vio0
25
,n
1       inet 10.189.218.220/20
a
inet6 fc00:a880:2:d0::2081:1/64
!route add -inet6 default fc00:a880:2:d0::1
.
wq
101
If you haven't noticed, I did obfsucate the IPs a little bit by using non-public ranges in the examples. Please fill in the your configuration files with the relevant values.
There's one last thing it seems is required to make this all work, is to
explicitly pass imcp6 traffic in the firewall like so:
# ed /etc/pf.conf
388
/pass
pass            # establish keep-state
a
pass proto icmp6
.
wq
405
# pfctl -f /etc/pf.conf
#
You should now be able to SSH to your instance over IPv6. Enjoy!
I rather enjoyed the challenge of setting up OpenBSD on a platform that doesn't fully support it and getting all of the features that are available on the mainstream operating systems such as Ubuntu.